Terrazzo came to be in Italy. Italian for terrace, terrazzo is what humble marble quarriers would do for home improvement, where dirt floors were standard fare. Each day the quarry workers would stuff their pockets and sacks with chips from the cubing and slabbing processes. Not but waste to their employers, the workers would bring this offal home to accumulate in a pile by the terrace. In time enough would accumulate to make a floor, and so the worker and family and friends would gather the mix it like you would concrete - cement and marble chips in lieu of gravel. Once poured, the worker would return on the second day while the pour is still quite green and he would set to grinding the top off of the slab thus exposing the beauty within the marble chips just beneath the neat paste cover. Following the grind, the worker would add a layer of neat paste as grout to fill any holes exposed in the first grinding only to return a second day to grind this grout layer flat again. On the third day the worker would finish with a fine grind to bring the floor to a high hone. According to Wikipedia he would seal it with goat's milk. There there no use in crying over split milk. On the fourth day he rested to enjoy his new floor with his family and friends and to make toasts to health and happiness and a bottle of grappa.
On the Forsyth-Vaquero project we had the opportunity to try our hand at terrazzo restoration. While in a serviceable condition their 80+ year old floor exhibited cracks and surface stains. I relied on the advice of local terrazzo guru Tony Anese, of Anese (Ah - knee - see) Masonry about how to approach it. The photos and captions below sum up his approach. Thanks Tony.
Enjoy and Happy tiling!
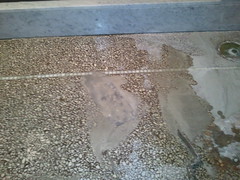
Photo 1: Cracks Chased
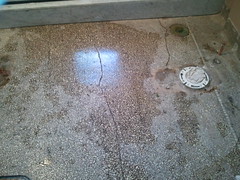
This photo shows cracks in floor now "chased". To Chase means to cut out the crack. This helps clean it out and make room for crack filler material. I chased the cracks with a mini saw popular among tilers. I used a 4-1/4" continuous rim wet cutting diamond blade. I set the foot of the saw to a depth which breached the terrazzo topping and went into the mud bed below, about 7/8".
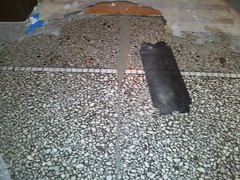
Photo 2: Prep for mosaic inlay
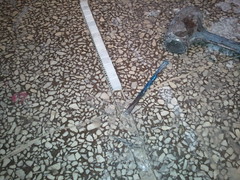
Here, I simply cut a chase the width of the mosaic plus one joint. I used the same saw I used to chase the cracks. For control, to keep a straight line, I used my tile setter's aluminum straight edges held in place with my knees. Always the knees in tiling.
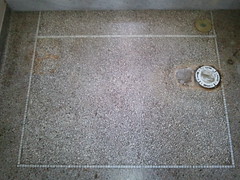
Photo 3: Cracks filled Mosaic set
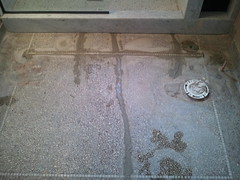
Photo 4:Latex admixture
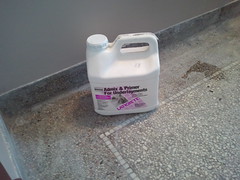
Heres a photo of a latex admixture product from Laticrete. You might also consider Tec, Mapei, Custom, or Hydroment brands - All top notch.
Photo 5: Slurry shot
I let the filler cure 24 hours. While hard, it is still green enough to work. Here I used a 120 grit drywall sanding screen, water and good old elbow grease to sand the filler flush with the surrounding terrazzo. You need not worry about damaging the surrounding floor. It is far too cured to be affected.
Photo 6: Before and After the Sanding Screen
Here is a shot of the sanding screen. Above the line of the mosaics you can see the overfilled crack. This is the before sanding condition. After about five minutes of vigorous sanding and below the mosaics you can see the after condition. The crack is now sanded flush. You will need to the process a second time, because the filler from the first go will shrink a wee bit while curing.
Photo 7: The Finish
Next I sanded the entire floor with 60 and 80 grit screen and water followed by three coats of Terra Glaze, a popular terrazzo coating by Spartan Chemical. This final step is all you really need do if you have a crack free floor which looks a little chalky or tired. A good sanding with water or perhaps add a bit of oxy-salicic acid to brighten up the marble chips in the mix. Keep it clean and keep up with the Terra Glaze from time to time.
Let me know what you think by hitting the like button above or leaving a comment below.
No comments:
Post a Comment